Here is a clear guide to the glitches and twitches you might have as you get to know WordPress. (If you can’t find your answer here, email for assistance – we don’t want you to miss this opportunity to participate in publicity and community.
*
FIRST, REGISTER AND LOGIN
- Register
- Once you’re successfully registered,
- And add new events here (If you’re going to upload a few events, you may want to bookmark this link)
Username: It’s best to use your real name – it helps if we need to contact you for any reason regarding your event.
Password: Keep it safe and choose an unusual one with numbers and letters to avoid your account being hacked.
If you uploaded an event last year, your username and password will still be in the system. If you’ve forgotten your password,
You can bookmark this page and have your browser save your password and username.
THEN input your TEXT
- Click “add new”

Give the event a name
*Keep it short: If the event name is more than a few words, it will be truncated when it appears on the calendar alongside other events, and people might overlook it.
*Be obvious: Choose the most recognisable and self-explanatory title. For example,” Party in my pants” is only relevant if it’s literally the event, company or organisation name. If you don’t have a name for your event, that’s fine – you can just as effectively use action words to encourage attendance, e.g. Design your own cupcakes.
*Include the type of event or location in the title if possible (in brackets is best): This helps people find exactly what they’re looking for. Remember that Creative Week Cape Town hosts events of all kinds, so a simple, descriptive name helps your audience find you faster.
*If you change the event name at any time, you must manually change the permalink that appears directly underneath the event name input field, or your event thumbnail won’t work. This must be exactly what the new name is. The best is to copy and paste from the name field into the permalink field (press edit to input, and OK when you’re done). Remember to remove any spaces at the end of the event name in both fields.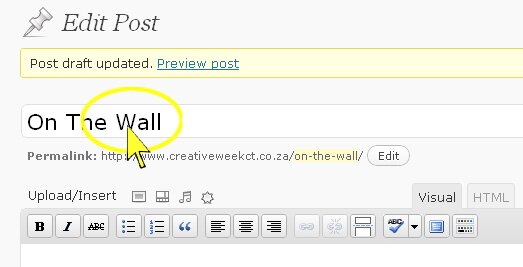
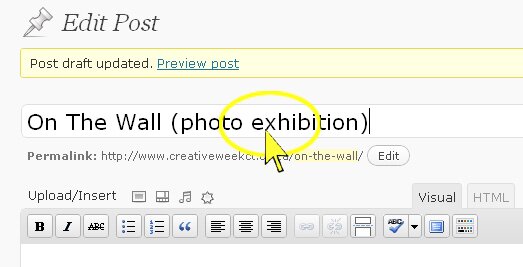
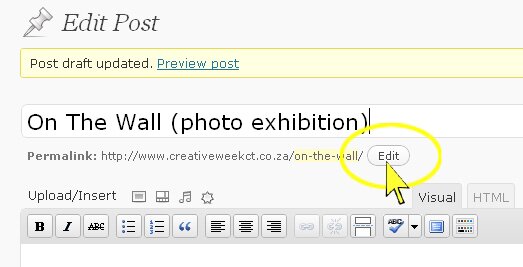
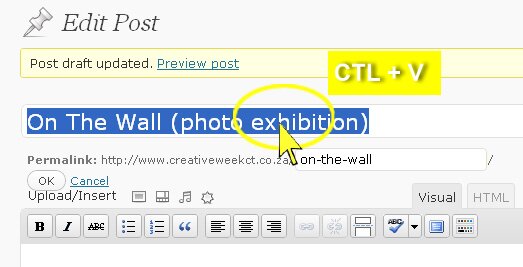
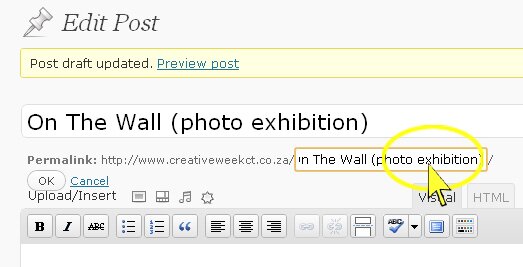
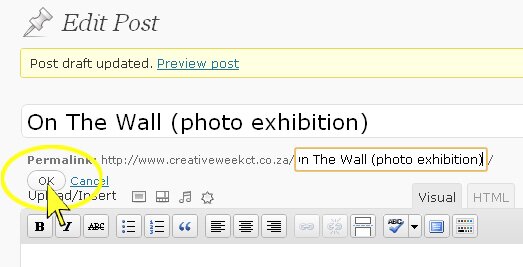
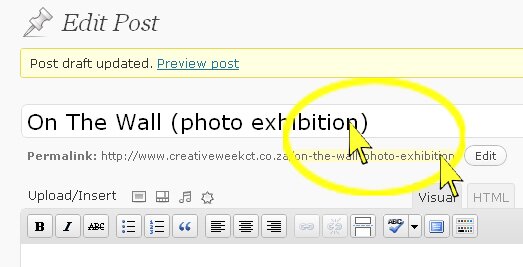
- Input your event details
Event details (below the main input area) are for the basics: event location, event time, event contact, admission fee (if applicable – do say FREE if it is a non-paying event, and if the tickets are tiered, give the range, e.g. R45 – R85 seat dependent).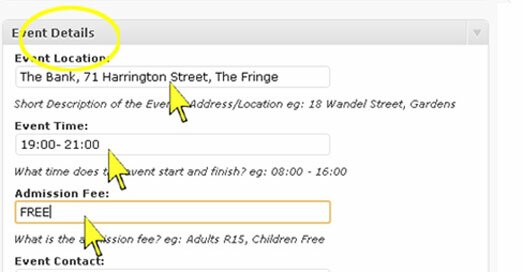
The main input field (above event details) is a good place to include a brief description of the event – context, background and where to get further information.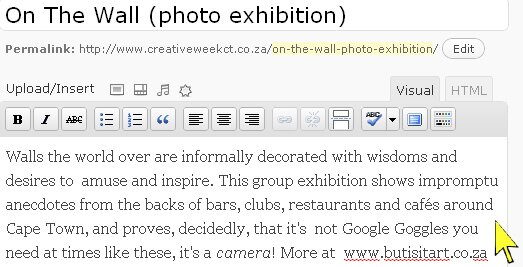
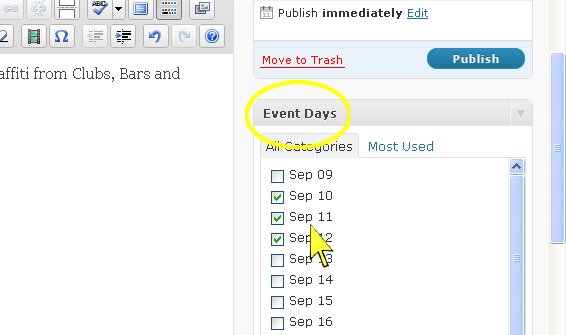
- Choose the relevant dates
If your event opens on a particular date, but is available for viewing afterwards, remember to select all days for its duration.
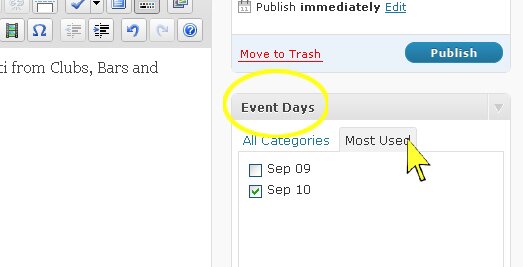
- If your event benefits from a cluster schedule, you can choose the most popular days on the calendar, on the most used tab.
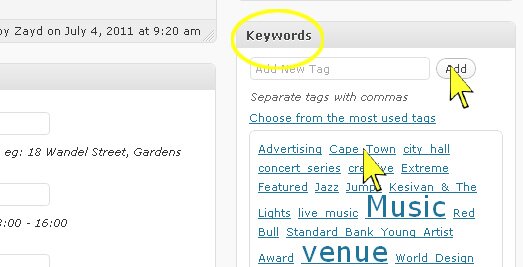
- Tag your event – help browsers find your event quickly by tagging it with relevant keywords. Be clear and concise – if it’s a workshop on integrating creative production with social media profiles, use tags like Facebook, marketing, communication, workshop, how to, streamline, creativity, exposure.
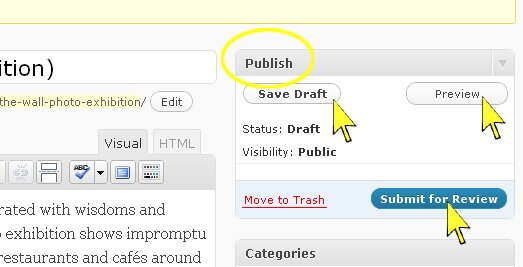
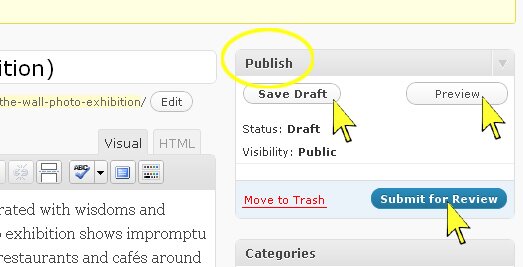
When you’re happy with your event and you’ve added relevant images, submit it in the publish window. You should also be saving your draft regularly, and can preview your event at any time. If you’ve made a series of changes, it’s a good idea to save your draft first, and then preview. Take care that all information is correct before submitting it for review, as you cannot edit details between submitting and publishing it. After it has been accepted for publishing, you can edit it at will.
FINALLY, INCLUDE IMAGES
Including images is fairly easy – WordPress will reduce your images to the required size in most instances. However, it will not increase images that are too small. Make sure your images are a minimum of 500 pixels wide.
- Featured image: 500 pixels wide
- Thumbnail on event listing page: 190 x 130 pixels
- Event single page: 330 pixels wide
When it comes to thumbnails, some thought and care is required. WordPress crops thumbnails of your images for use around the site and in posts to other sites (e.g. Facebook).
- If your image is long (portrait), it will be cropped at the bottom until it fits correctly.
- If your image is wide (landscape – the favoured format), it will be cropped from the left and the right.
OTHER IMPORTANT POINTS
- Depending on your internet connection or preferred browser, it is always wise to assume that your page might crash at any time; even the internet is not perfect. To avoid losing input data and time spent uploading your event, please make sure you save your draft regularly as you input text and images
- Underline, bold, colour and italicise your text sparingly. Formatting makes text easier to read if it is not over the top. Using formatting experimentally may seem interesting and different and even suit yOur creative/innovative evEnt, but it also makes it harder to read, and can cause the busy internet browser to skim and skip your event. Keep it simple using the buttons shown below.

- Word and WordPress do not get along (similar as their names are and as much as they seem to on first glance): To remove any antsy invisible coding and formatting that Word copies across without your permission or knowledge, highlight the desired text and press the button with the Word icon on it. This will open a dialogue box for the text and will insert it for you.
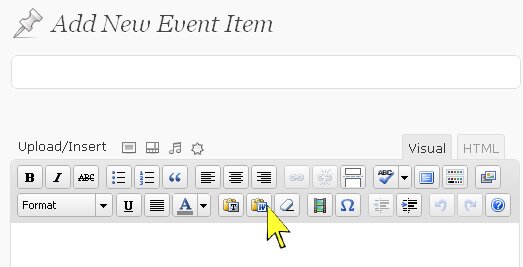
If you cannot see this, press the “show/hide kitchen sink button”.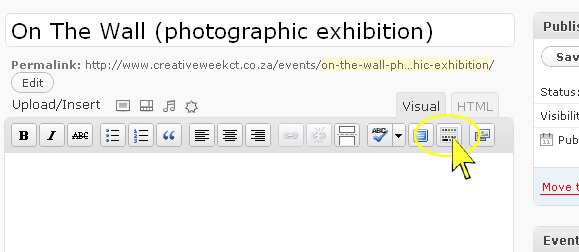
- You can preview your event at any time once you’ve saved it (or WordPress has automatically saved for you, as it does from time to time. Don’t depend on it, though – browsers are a rowdy bunch bound to crash or freeze, and frequent, manual saves can save you a lot of unnecessary repeats).
